How to Cut Your Own Hair at Home: Step-by-Step Guide for Men and Women
By the 10Trim Editorial Team — Last updated: July 2026
Learning how to cut your own hair is one of the most useful grooming skills you can pick up. Done right, it saves you a small fortune over a year, keeps your look sharp between appointments, and means you're never stuck with shaggy hair before an event. Done wrong, it means an emergency hat and a sheepish walk into the salon. The difference is almost entirely about technique, patience, and the right tools — not natural talent.
This guide walks you through cutting your own hair at home from start to finish, whether you're buzzing it short with clippers, tidying the sides and neckline, trimming long hair yourself, adding layers, or cutting someone else's hair for the first time. The trick isn't talent, it's control: go slow, cut less than you think you need, and check your work from every angle. You can always take off more, but you can't put it back.
What you need before you start
You don't need a professional station, but a few basics make the whole job easier and the result far cleaner. Cutting hair with kitchen or craft scissors is the single most common mistake, because dull, wide blades chew the hair instead of slicing it, which leaves frayed, uneven ends.
- Clippers with a full set of guards. A decent set of hair clippers with numbered guards (usually #1 to #8) is the backbone of any short home cut. The guard number roughly equals eighths of an inch of length.
- A quality pair of hair scissors (shears) — not kitchen or craft scissors — for length, layers, and detail work.
- A hand mirror plus your bathroom mirror, or a phone propped on a shelf recording video, so you can see the back of your head.
- A fine-tooth comb and a spray bottle of water to section and lift the hair evenly.
- Sectioning clips to keep everything you're not cutting out of the way.
- Good lighting and a cape or old towel, plus a hard floor you can sweep — clippings work into carpet and stay there.
If you're still deciding what machine to buy, our guide to choosing hair clippers for men breaks down motors, guards and corded vs. cordless, and an all-in-one haircutting kit is usually cheaper than buying clippers, guards and shears separately. Wash and towel-dry your hair first for a short clipper cut; for scissor work on longer hair, lightly dampen it so it sits where it will actually fall when dry.
As an Amazon Associate, 10Trim earns from qualifying purchases.


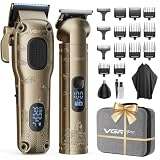

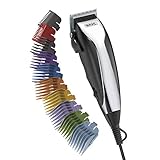


How to cut your own hair short with clippers
A short, clipper-cut style is the easiest way to cut your own hair because clippers do the length-setting for you. The trick is working from long to short so you can always go shorter, but never longer. Start with dry, brushed hair so you can see its natural shape.
Step 1: Set the top length
Start with a longer guard than you think you need — our clipper guard size chart shows exactly what each number leaves in inches and millimeters. Run the clippers against the grain (against the direction of growth) over the top of your head in slow, overlapping passes. If you want to keep length and style the top with scissors instead, skip the clippers up top and handle it separately, so it doesn't end up looking boxy.
Step 2: Clipper the sides and back
Switch to a shorter guard for the sides and back — typically one to three sizes down from the top. Move the clippers upward from the neckline, following the curve of your head, keeping the clipper flat against your scalp. Use your free hand and the hand mirror to reach the back. Keep passes even and let the guard do the work; don't press hard.
Step 3: Blend the transition
Where the shorter sides meet the longer top, you'll see a hard line. To soften it, use a guard that's between the two lengths and flick the clippers outward at the transition point (a rocking, scooping motion). This is the basic idea behind a fade — if you want the full technique, our low fade guide covers guard progressions in detail.
Step 4: Clean up the neckline and edges
Remove the guard (or use a trimmer) to square off or round the neckline and tidy around the ears. Go slowly here — a crisp outline is what makes a home cut look intentional rather than accidental.
How to cut your own hair straight and evenly
Getting a straight, even line is about sectioning and tension, not luck. Damp hair is easier to cut straight than dry hair because it lies flat and shows its true length.
- Section the hair. Split it into manageable parts with clips so you're only cutting a little at once.
- Use a comb as a guide. Comb a section straight down, pinch it between two fingers, and slide your fingers to the length you want — that line becomes your cutting guide.
- Cut with the blades slightly angled (point-cutting) rather than a hard blunt line, which blends better and hides small mistakes.
- Check both sides. Pull two front sections down to your chin and compare; they should end at the same point.
To keep long hair even, always cut the same amount from each section and use the previous section as a length reference. If you do want a blunt line straight across at home, comb the hair forward, hold it flat, and cut in small snips rather than one big chop.
Cutting hair straight with scissors: the three things that go wrong
Almost every crooked home haircut comes down to one of three errors, and all three are fixable once you know what to watch for.
- Uneven tension. If you pull one section tighter than the next, it springs back shorter. Comb every section with the same pressure and let your fingers rest — don't tug.
- Tilting your head. Leaning toward the side you're cutting shifts the whole line. Keep your chin level and your eyes forward, and let the mirror do the checking.
- Cutting the whole section in one pass. Take three or four small snips across the width instead. A long single cut is very hard to keep level.
Hold the shears with your thumb doing the moving and the rest of your hand still — that's what keeps the blade line steady.


How to cut long hair yourself
Cutting longer hair yourself is more forgiving in some ways (small mistakes hide in the length) and trickier in others (you're using scissors, not guards). The goal is usually to take off length and remove weight without creating a blunt, uneven line. Work on damp, combed hair and cut a little at a time.
The ponytail method for taking off length
The simplest way to cut long hair yourself is the flip-forward ponytail method. Comb all your hair forward, gather it into a ponytail centered on your forehead, slide the tie down to where you want the shortest point, and cut straight across below the tie. When you release it, the hair falls into soft, face-framing layers. It's forgiving because you're cutting one gathered section rather than trying to match both sides freehand.
Section, don't rush
For more control, part your hair into sections and clip away everything you're not working on. Pull each section down between two fingers, slide your fingers to your target length, and trim the ends below your fingers. Point-cutting into the hair vertically rather than straight across softens the ends and hides small mistakes.
How to cut your own hair in long layers
Long layers add movement and stop long hair from looking heavy and flat. The most reliable DIY method is the same flip-forward technique above, taken a step further:
- Comb clean, damp hair straight forward over your face and gather it into a single ponytail at your hairline, right in the center of your forehead.
- Slide the elastic down the ponytail to the point that sets your shortest layer — the further out you cut, the more dramatic the layering.
- Cut straight across below the elastic, or point-cut into it for softer ends.
- Release, comb through, and check the balance. Because everything is gathered to one central point, the layers come out symmetrical and graduated — shorter around the face, longer at the back.
Cut conservatively the first time. You can always slide the elastic out and take off a little more; you can't put it back. If you want heavier, more defined layers only on top, work in smaller sections and raise each one straight up before trimming the ends.
How to cut your own hair as a woman
Cutting women's hair at home usually means managing length and layers rather than buzzing sides. For a simple trim, part your hair down the middle, bring both sections forward over your shoulders, and trim each to match — comparing them constantly is what keeps the two sides level. For layers, the upside-down ponytail method above is the safest route, and it works on almost any length past the shoulders.
Long hair is more forgiving than short hair because small errors are less visible. Take off no more than an inch at a time, and remember that hair looks shorter once it dries and springs up, especially if it's wavy or curly. Fringe and face-framing pieces are the exception: cut those dry, in tiny snips, or you will end up an inch higher than you planned.
Cutting curly, wavy, and very thick hair
Texture changes the rules. Curly hair shrinks dramatically as it dries — a curl cut wet at shoulder length can sit two or three inches higher once it springs up — so curls are usually best cut dry, curl by curl, taking the very ends off each one. Wavy hair sits in between: cut it damp, but leave an extra half inch of margin. Thick hair has the opposite problem: there's too much of it to handle in a few sections, so split it into six or more, clip everything you aren't actively cutting out of the way, and expect the job to take twice as long.
How to cut the back of your own hair
The back is where most people struggle, because you can't see it directly. The fix is a two-mirror setup: stand with your back to a wall mirror and hold a hand mirror so the two reflect each other. This lets you watch your hands while you work. A phone propped on a shelf recording video is the modern alternative — cut a little, stop, and play it back.
For short hair, clippers with a guard handle the back easily; work upward in slow vertical passes, by feel, checking often. For longer hair, gather it back, comb it smooth, and trim small amounts at a time, checking the length on both sides so it stays balanced. Better still, use the flip-forward ponytail method — it lets you cut the back from the front, which sidesteps the problem entirely. Cutting the back of your own hair is completely doable; just resist the urge to rush.
Should you cut your hair wet or dry?
Damp is right for straight and wavy hair, because it lies flat and shows its true length under tension. Dry is right for curly hair, where wet cutting hides the shrinkage, and for all clipper work — wet hair clogs the blade, drags, and hides the shape you're trying to build. If you're combining both in one session, do the clipper work dry first, then dampen the top before you take scissors to it.
How to cut someone else's hair
Cutting someone else's hair is actually easier than cutting your own, because you can see the whole head. The same rules apply: work with damp hair, section it off, use a comb for tension, and cut small amounts. Communicate constantly, show the person the length before you commit, and check the balance from the front, the sides, and the back. If you're learning to cut hair for a partner or kids, start with simple trims and short clipper cuts before attempting layers or fades.
Learning how to cut hair: the order that actually works
If you want to learn properly rather than muddle through, build the skill in stages. Each one teaches a technique the next one needs.
- Neckline and edge cleanups. Zero risk, instant payoff, and it teaches you to control the clipper against your own head.
- A single-guard buzz cut. One length all over, impossible to make uneven, and it builds the overlapping-pass habit.
- Two-guard sides and back. Now you're blending one length into another — the core skill behind every taper.
- Scissor trims on the top or on long hair. Sectioning, tension, and finger guides.
- Layers and fades. Only once the first four feel automatic.
Practice on a willing partner, or on your own back and sides where mistakes hide. Most people plateau simply because they only cut once a month.
How often should you cut your own hair?
Short clipper cuts look sharp for about two to three weeks before the neckline and the blend start to blur; a mid-cycle edge-up buys you another week. Longer hair only needs a trim every eight to twelve weeks to keep the ends from splitting — cutting more often than that is how people accidentally lose four inches over a year. Little and often keeps the shape clean and makes each session quicker.
Common mistakes to avoid
- Cutting too much at once. Hair looks longer wet and drops when dry — always leave more than you think and reassess.
- Skipping the guard test. Start one length longer than your goal; going shorter is easy, going longer isn't.
- Ignoring the back. Use two mirrors and take your time — the back is what everyone else sees.
- Using dull or wrong scissors. Craft and kitchen scissors crush and split the hair; proper shears cut clean.
- Cutting curly hair wet and short, forgetting how much it shrinks as it dries.
- Chasing an uneven side. Evening out one side by trimming the other, over and over, is how a trim becomes a buzz cut. Fix it once, then stop.
- Rushing the blend. The transition between top and sides is where amateur cuts give themselves away.
Aftercare and cleanup
Rinse or shower right after the cut — loose clippings trapped against the neck are what makes a fresh haircut itch all day. Brush the neckline and shoulders before you take the cape off, not after.
Then take two minutes on the tools. Brush the cut hair out of the clipper blade, wipe it down, and put a couple of drops of clipper oil across the teeth while the unit runs. Blades that get oiled every cut stay sharp for years; blades that don't start pulling hair within months. Wipe your shears dry and store them closed, away from other metal. Keeping the edges sharp between full cuts is the same discipline our beard-trimming guide applies to facial hair.
Is it cheaper to cut your own hair at home?
Almost always, yes. A one-time investment in a good clipper kit pays for itself in a couple of months compared to regular barber or salon visits, and every cut after that is essentially free. That said, not every cut has to be a home cut: complex fades and precision layering are still worth paying for. We lay out where the line sensibly falls in our barbershop vs. home haircut breakdown — it's about more than money.
The bottom line
Cutting your own hair is a skill that rewards patience far more than it rewards nerve. Start longer than your target, work in slow overlapping passes with clippers, section and use finger guides with scissors, use two mirrors for the back, and account for shrinkage if your hair is curly. Your first home cut won't be perfect, but by your third or fourth you'll wonder why you ever paid for a simple trim. Get the tools right, take your time, and the results will speak for themselves.
Related Info and Products:
- How to Cut Your Own Hair in Layers: A Step-by-Step Guide
- How to Cut Hair With Clippers: A Step-by-Step Guide for Beginners
- How to Cut Men's Hair at Home: A Beginner's Scissor Guide
- Barbershop vs Cutting Your Own Hair at Home: Which Is Right for You?
- How to Cut Hair at Home: A Beginner's Guide with Clippers and Scissors
- How to Shave Pubic Hair for Men: A Safe, Step-by-Step Guide
- Hair Clippers for Men: How to Choose, Where to Buy, and How to Cut
- How to Trim Pubic Hair Safely: A Step-by-Step Guide
- How to Trim a Beard: A Step-by-Step Guide for 2026
- How to Shape a Beard Properly: A Simple Step-by-Step Guide (2026)
Last update 2026-09-10. Price and product availability may change.
Leave a Reply